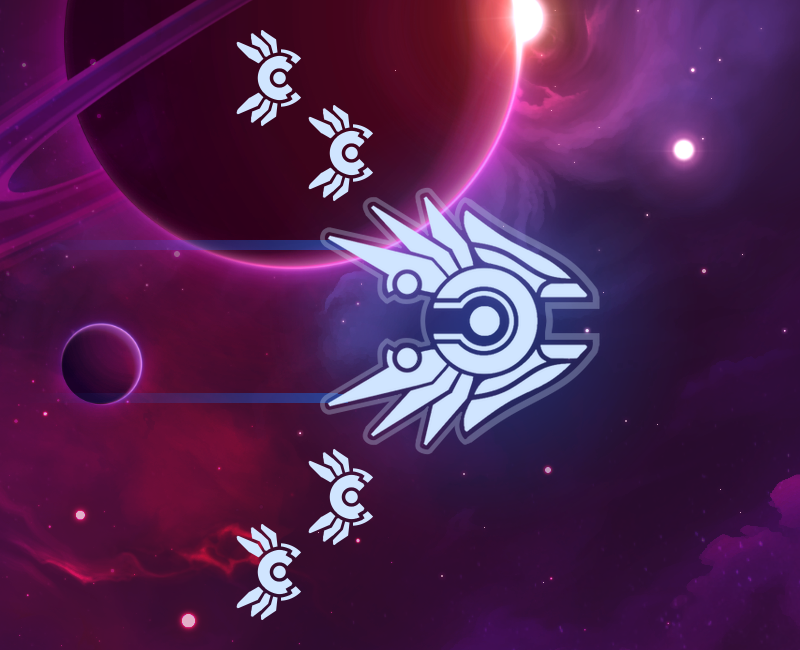
Nova Drift's 1.0 update adds the ability to override body and drone artwork with custom artwork! Players may also create their own!
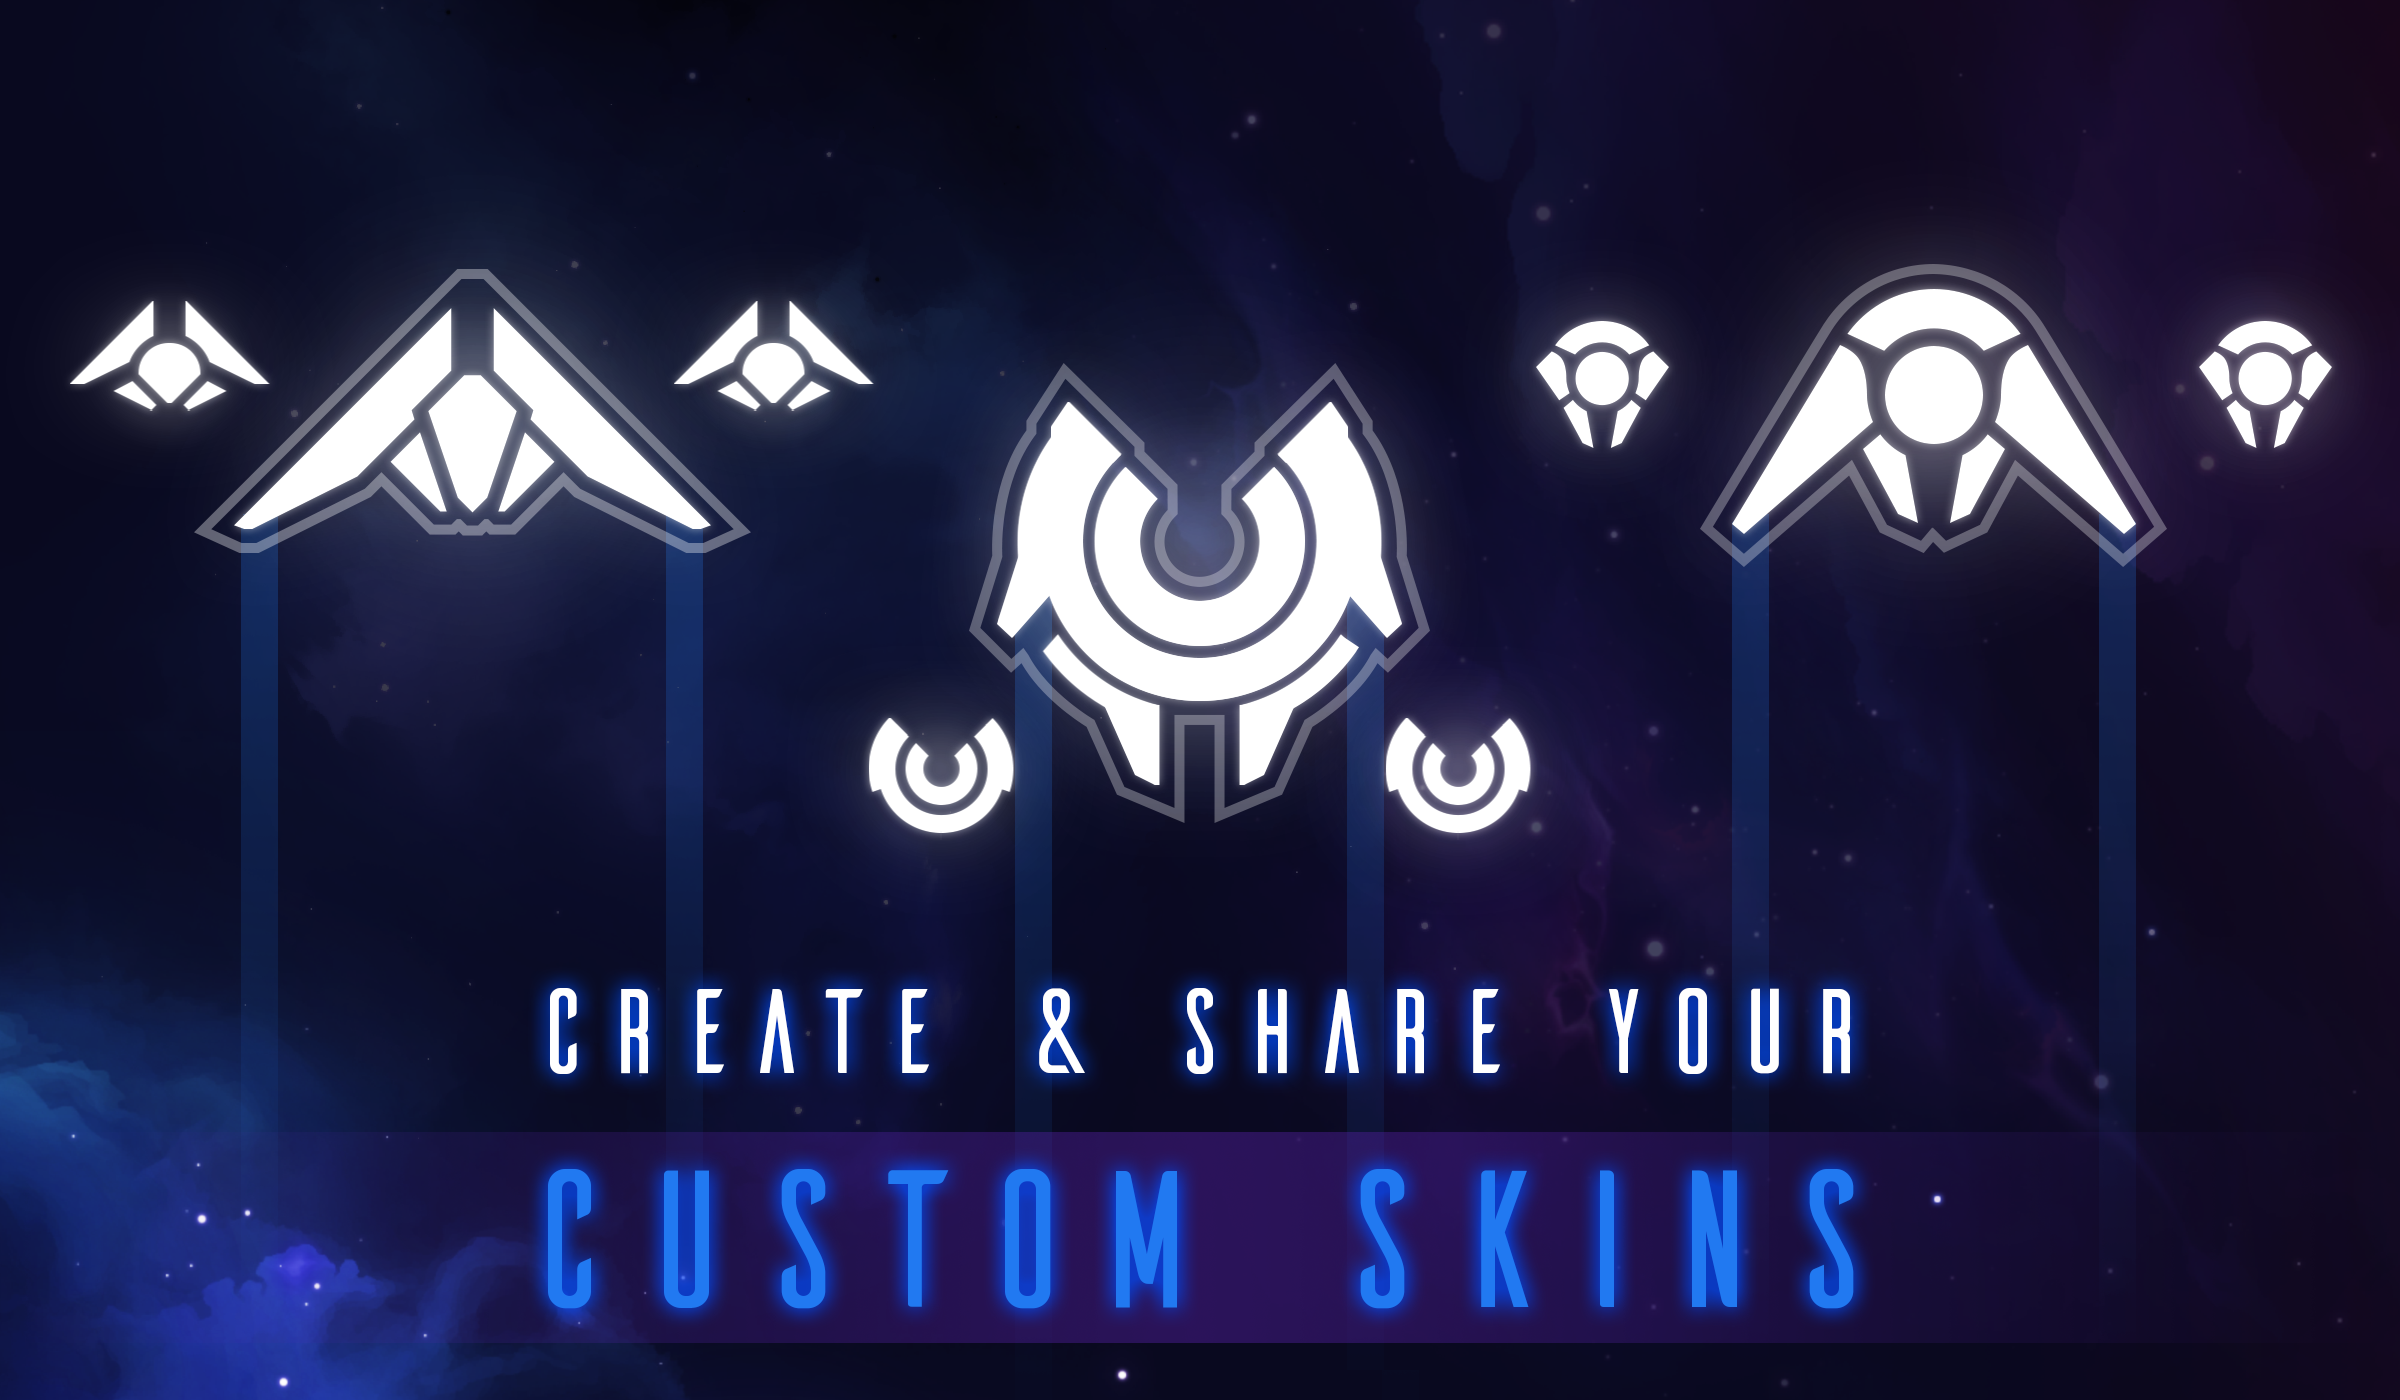
The game comes with 3 custom skins by default, and in this guide I'll break down how to add your own. Additionally, since some players expressed interest, I'll demonstrate how to match the Nova Drift art style exactly.
Using & Creating Custom Nova Drift Skins
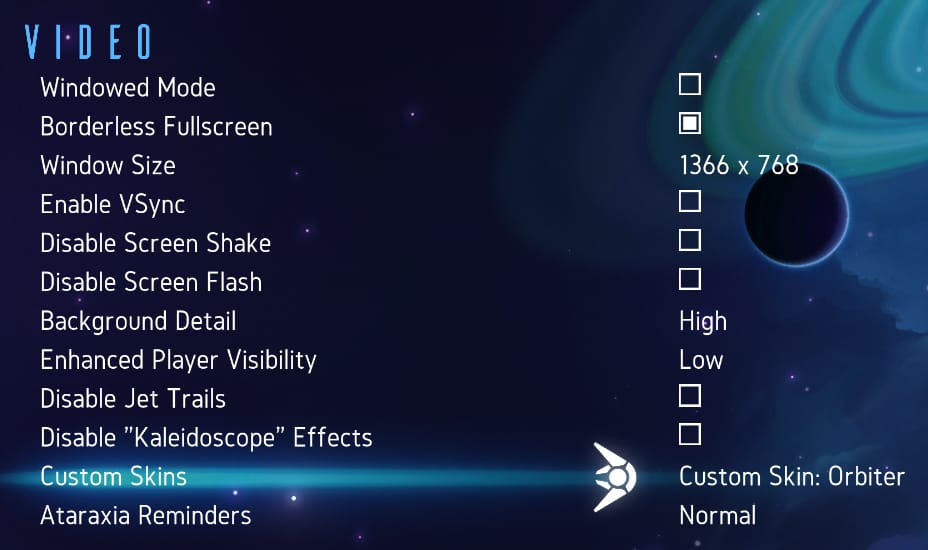
To select and use Custom Skins, just go to the Settings menu and choose your favorite. Any that are set up correctly will appear in the "Custom Skins" option.
I've tried to make adding custom skins as accessible as possible, requiring you only to drop artwork the game's custom_skins folder and edit one line of text for each skin. A skin must have the text data, body artwork, and force armor artwork. Optionally, drone artwork and jet position data may also be included.
Setting Up Custom Skin Artwork Data
Data for custom skins is found in the custom_skins folder, which is in this filepath by default:
PC: Nova Drift\datafiles\custom_skins
OSX: NovaDrift.app/Contents/Resources/custom_skins
If you're using Steam, that file path might look more like:
C:\Program Files (x86)\Steam\steamapps\common\Nova Drift\custom_skins
Every skin needs two elements: Artwork, and the data inside of the custom_skins.csv file. The .csv file tells the game which artwork goes with which skin.
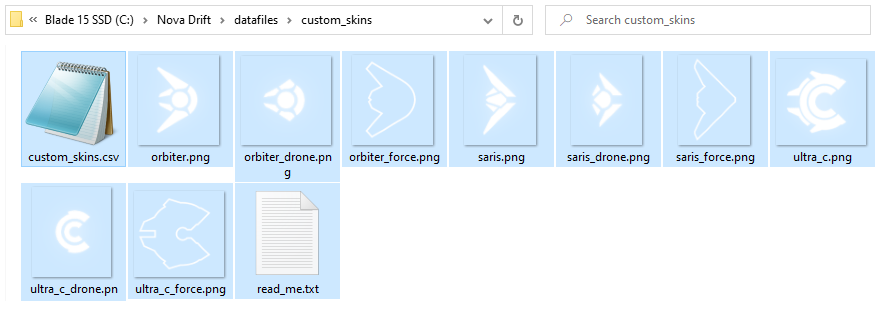
To add your own custom skin, follow the examples of the included custom skins provided. The .csv file can be edited with most text editors, including Notepad. The file looks like this:
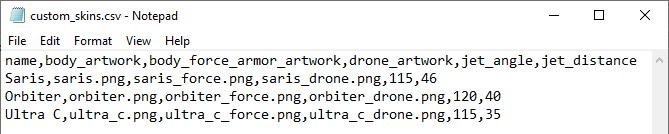
Here, we can see the data for the three default custom skins: Saris, Orbiter, and Ultra C.
Please note:
- The first line of the .csv is an example that the code ignores.
- Every custom skin should be on its own line in the document.
- The data values for each custom skin should be separated by commas, with no spaces.
- Each skin must follow the format of: name,artwork,force_armor_artwork,drone_artwork,jet_angle,jet_distance
I'll explain the values that can be defined, from the left to right:
- Name: This is a string of text that will be shown in the settings menu, labeling the custom skin.
- Body Artwork: This is the file name of the sprite that will replace whatever the default body artwork is. More info below.
- Body Force Armor Artwork (required): This is the file name of the sprite that will be layered below the body if the player has the "Force Armor" upgrade. More info below.
- Drone Artwork (optional): This works just like the body artwork, but it applies to drones instead of the body. If this is left blank, no change to the drone artwork will occur.
- Jet Angle (optional): Jet angle and Jet Distance define where the body's two jet trails originate from relative to the origin (the center) of the body artwork. Jet Angle defines the angle, in degrees, from where the jet originates (where zero is the front-facing of the body), while Jet Distance defines the distance (in pixels) from the origin of the ship. Then, these values are mirrored for the other jet. For instance, if you have a body whose wings are straight out to the sides you would use 90 for the jet angle, and the number of pixels from the center of the artwork for jet distance. This is an optional value; leaving it blank would result in both jets coming from the central origin of the ship.
- Jet Distance (optional): See above.
Artwork Recommendations
I recommend providing a .png file for artwork, as they are lossless, but .gif and .jpg/.jpeg files should also work. For best results, the artwork should be somewhere around 200-320 pixels in width and length.
Note that the game will do its best to make the custom body a similar size to the body gear it is representing. It does this by comparing the largest dimension of the original artwork to the largest dimension of the custom artwork and adjusting the artwork size by the difference. So, if you provide an oversized piece of artwork, it won't result in a larger body. If the provided artwork is too small, it may appear blurry if the game scales it up, which it may do either to fit the body size or accommodate retina displays. Also, its best to avoid empty space around the artwork, as it will be included in the size calculation and will result in a smaller looking body. For reference, most bodies are visualized in-game at around 40% of their original artwork size.
Sprite Color
I recommend that your sprites are pure white. Player color is defined by their shield color. This coloration is applied multiplicatively, so if the custom artwork is pure white, it will look consistent with the art style of the game when shield color is applied.
Hit Boxes
The collision box for custom skins is created automatically from the image sprite. Portions of the image that have very high opacity, or 100% opacity, will have collision. In terms of the Gamemaker engine, this is a "precise collision" set to tolerance of 200.
Sprite Offsets
The offset for the sprite will automatically be set by finding the center of the image provided. It is important that both the body artwork and the force armor artwork share the same origin position relative to each other if they are to align in-game.
Notes
- Custom skins don't make a visual Viper body barrier indicator. This has no effect on gameplay.
- Leviathan body segments are all assigned the same sprite as the custom skin.
Please consider that while we encourage you to create, play with, and share custom skins, we must disable submitting global scores while they are in use, since players can easily use this feature to make the game more or less difficult.
How to Match the Nova Drift Art Style
If you'd like to, here's a guide to help you make your skins consistent with the Nova Drift art direction. I personally used Photoshop, but you can use anything that will let you draw with vectors and apply glows.
Step 1: The body vector shape
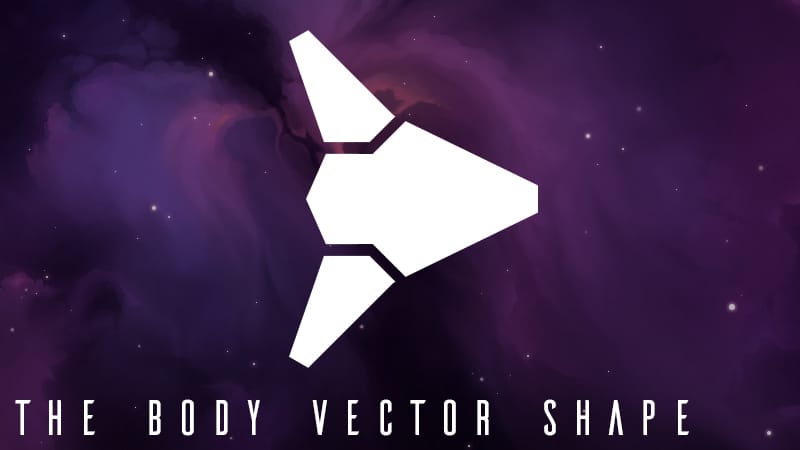
Draw the body using white vector shapes. In Photoshop, this is accomplished using the Pen tool.
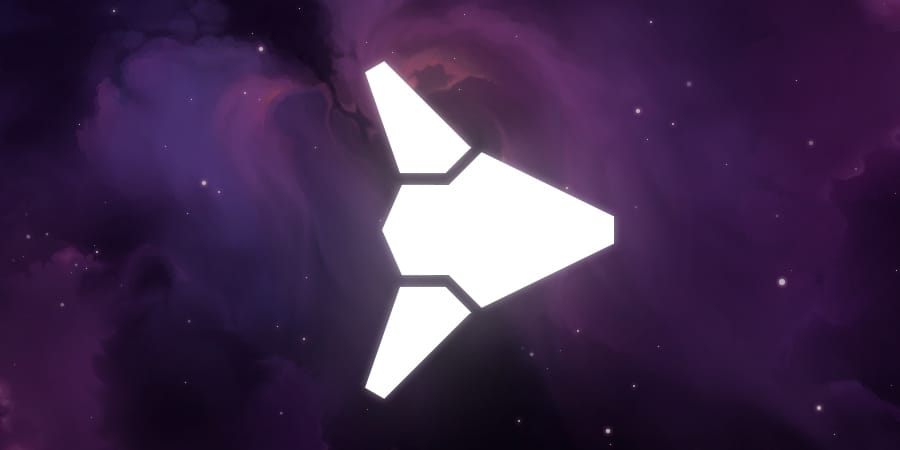
Step 2: The "tight" body glow (On the same layer as above)
Nova Drift usually layers several glows on top of each other for its signature style. One of them is very small and traces the object shape, making it look neon. The second is the same but much larger, appearing to radiate light outward. And the third is a diffuse, circular glow. This one doesn't trace the shape of the object, it's just a circular gradient.
If you don't want to deal with all of this, feel free to just be lazy and make a single glow that averages the values between first two that I demonstrate. It won't make a huge difference.
I'll demonstrate the "tight" glow first:

In Photoshop, this is accomplished by double-clicking a layer to get to the "Layer Styles" menu, checking "Outer Glow" and entering some numbers. Everything we make in this tutorial will use the same color as the body artwork, true white. For the glow I use a opacity of 25%, a size of 10px, and a range of 50%. The rest of the values are the defaults.
Step 3: The "wide" body glow (On a duplicate layer)
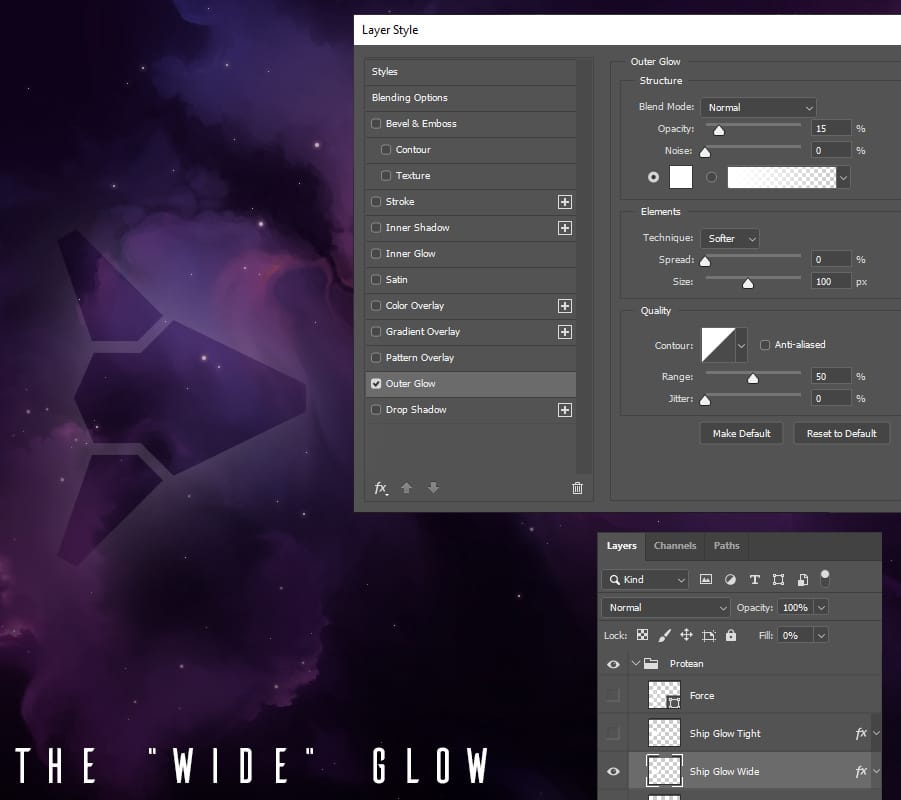
To make the wide glow, duplicate the previous layer so that you have a copy of your body artwork with a glow on it. Edit the Outer Glow in Layer Style to be wider and less opaque. I use 15% opacity and 100px size.
Finally, just so that the body artwork's alpha doesn't overlap, reduce the Fill of this layer to 0%. This makes the body art invisible, but doesn't hide the glow.
Step 4: The "diffuse" glow (On a new layer)
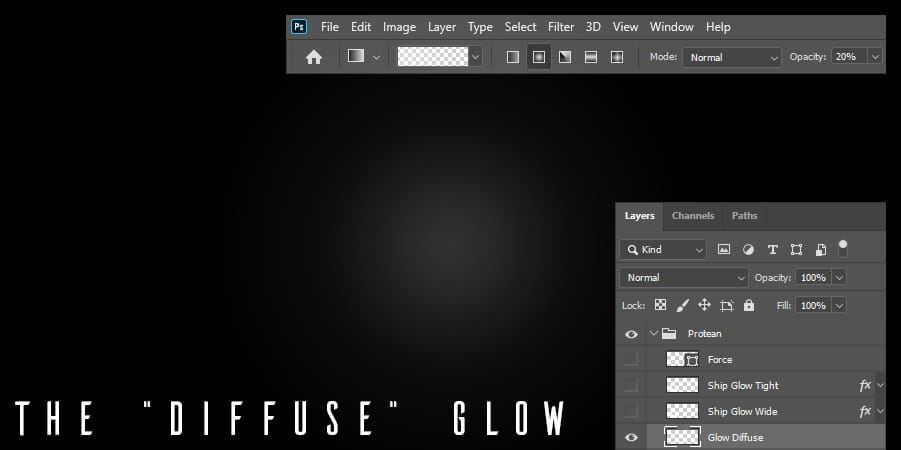
The diffuse glow doesn't use the body artwork. It's just a white blob. On a new layer, just draw a white radial gradient with 100% white as the starting color and 0% white as the ending color. To make it subtle, you can either draw it at 20% opacity in the gradient settings like I am showing above, or reduce the opacity of the layer itself to 20%. The shape should span the width of your document's size.
Turning all three layers on, you should see something like this:
Now, the Force Armor effect is the last thing to create.
Step 5: The Force Armor stroke (On a new layer)
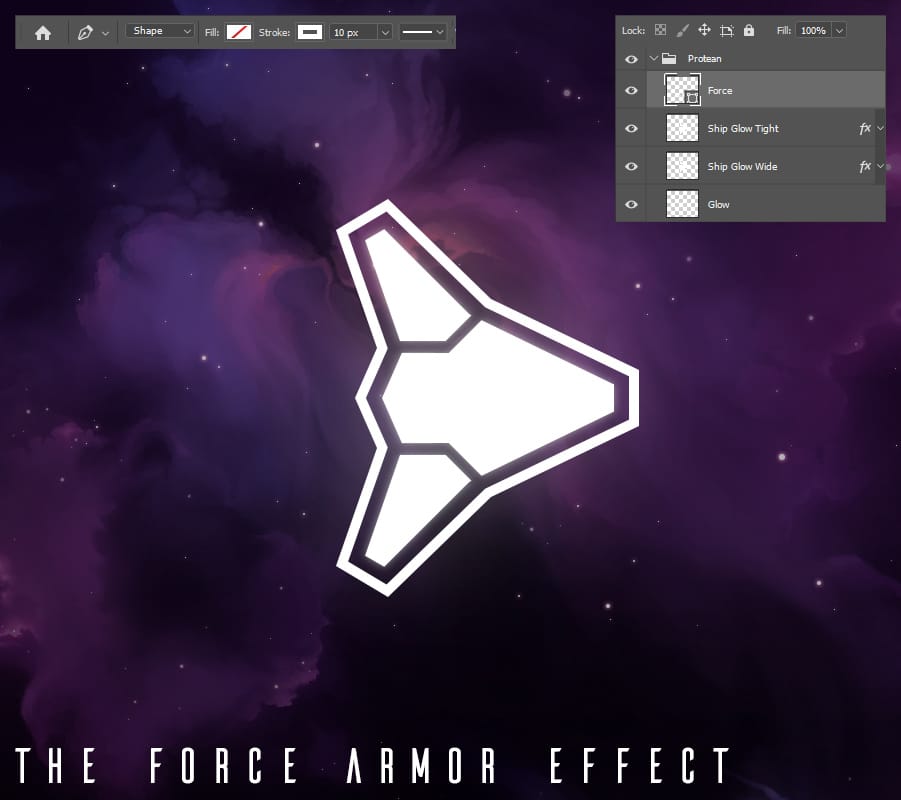
Using a vector line tool (in Photoshop this is called the Pen tool, turn off Fill and turn on Stroke), draw a shape around the whole body. It should be 10px in width and 100% opaque, and it looks good if there's around a 15 pixel buffer between the body and the inside of the effect. In-game it actually draws more like 30% opaque, but that is handled through code.
Step 6: Export your artwork

Finally, save two copies of the artwork: One version with just the Force Armor stroke visible, and one version with everything except the Force Armor stroke visible. The background should be totally empty.
To make the drone skins, the process is identical, except there's no need for Force Armor artwork.
Make sure your file names match the file names that the .csv file is indicating.
Share Your Skins!
If you create any, please share your custom skins on the official Nova Drift Discord! We have a special channel ready for them, and we've already seen many amazing ones.
I can't wait to see what you all come up with!
Want to help Nova Drift grow?
Steam Reviews really help! As a tiny operation, Nova Drift relies on its quality and reputation to sell, and reviews encourage players and content creators to give the game a chance. Please do take a moment to fill out a short review, even if it's only a few words. It just might make a big difference.
Don't want to miss my next game? Follow me!
On Twitter, BlueSky, and TikTok
Thanks for reading. Best wishes,
Jeffrey (Chimeric)